

Workshopshed 4
Time has come to see the 4th iteration of the Workshopshed. The first Workshopshed in London did me well for a few years. A small wooden shed which looked to be DIY construction rather than a kit. It was reclad, reroofed and painted a few times. Power was added along with a few sockets. It was mostly water tight and was poorly insulated. Workshopshed 2 was a double garage in Scotland. A little water leakage under the doors in the heaviest of rain but solidly built from brick and tile. Lots of space and storage. With power and basic heating. Since moving back south, the latest Workshopshed 3 has been a long and narrow concrete garage with a corrugated asbestos roof and concrete walls. I knew the roof would need to go, so that was priced into our purchasing decisions and a local contractor identified.
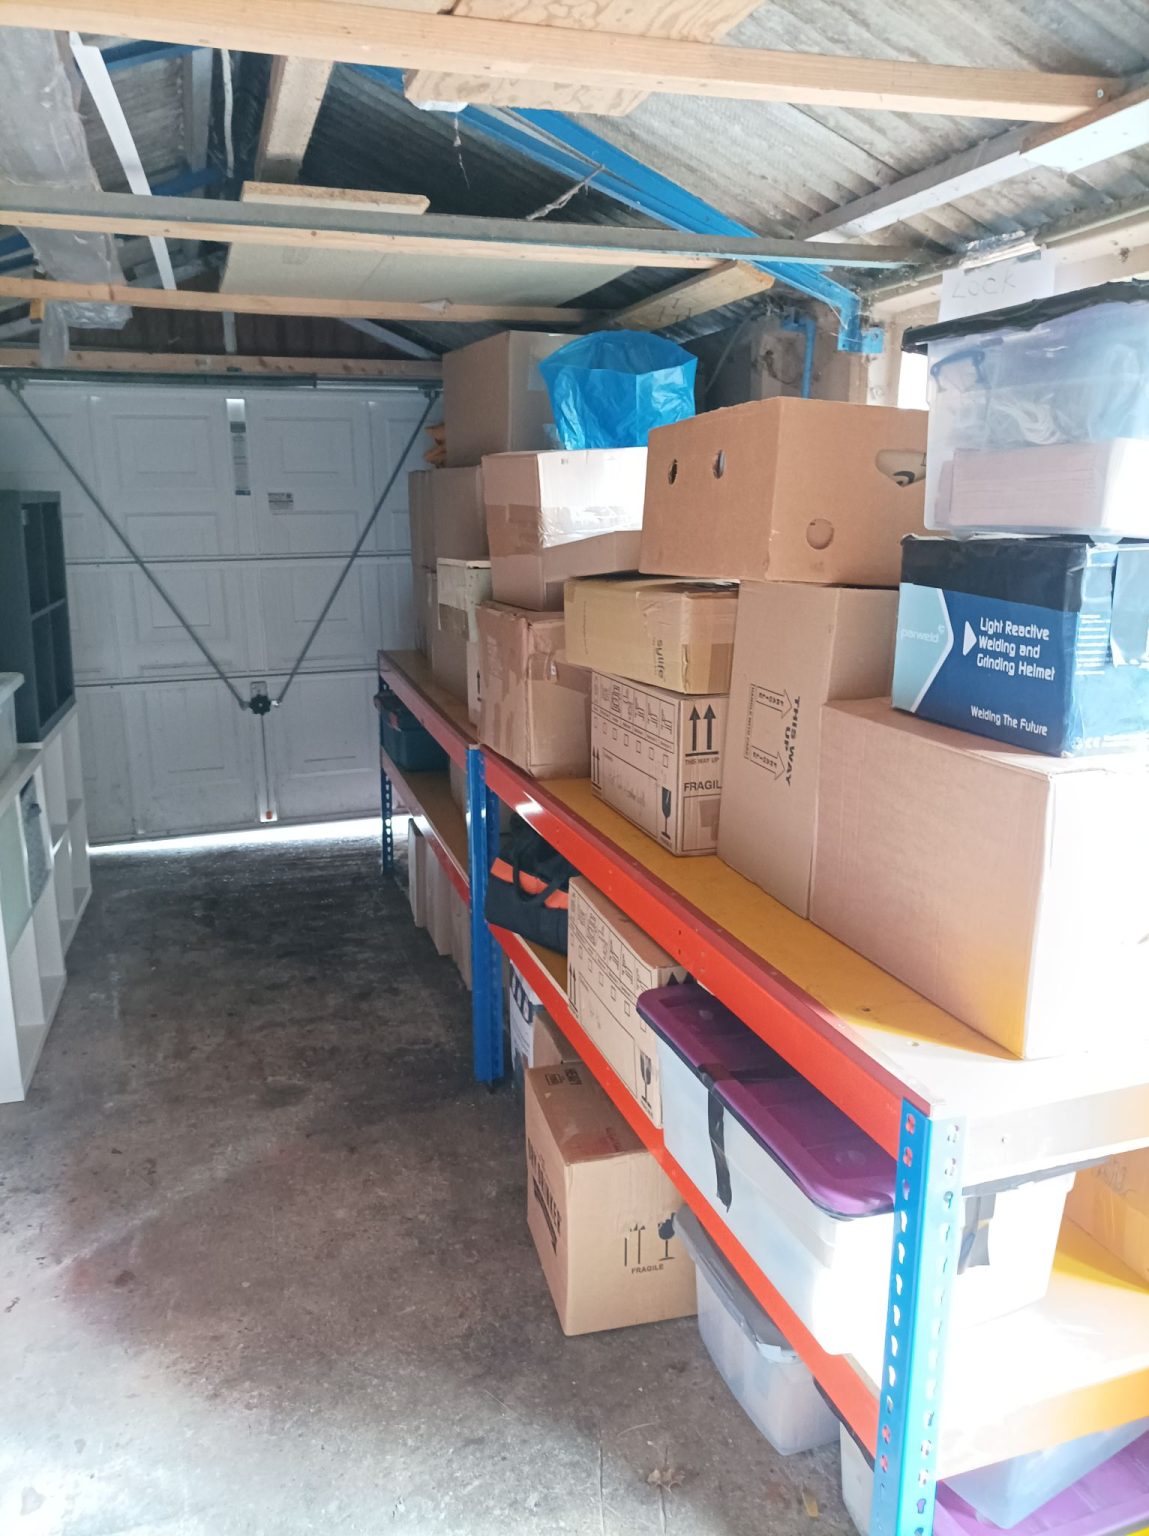
However 2 years in and it has proved to be far from ideal with a crampt layout and problems with damp and failing doors. Rather than patch it up, we decided to demolish it and build something that will last for many years.
Water proof and well insulated were my primary design aspects but we also wanted it to look good. It needed to work for both small maker/electronics projects but also bigger metal and woodwork projects. By looking at my existing benches and storage, a size of 7m by 3m was selected, shorter but wider than the existing garage. A lot smaller than Scotland but over 4 times the size of the original Workshopshed.
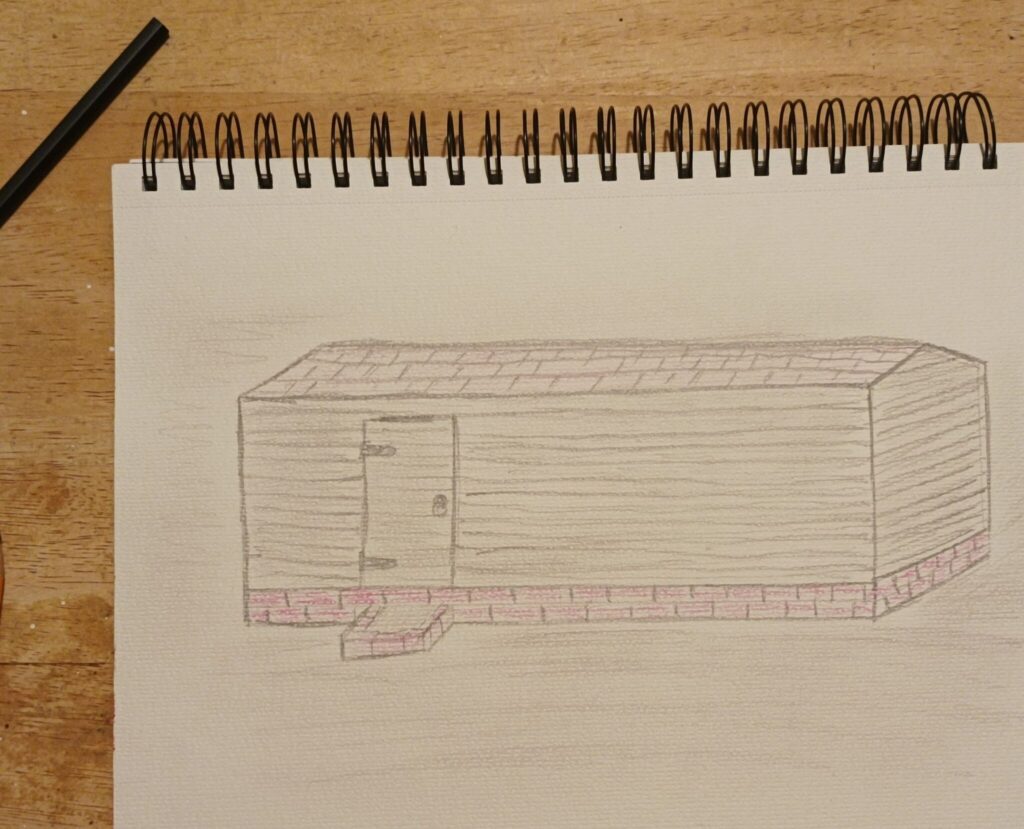
I chatted to a local builder and presented my sketch of a Suffolk barn style building. A couple of rows of red brick with black cladding and red tile roof, lots of insulation. After various designs and opinions were discussed it was concluded that the budget didn’t align with the ambition.
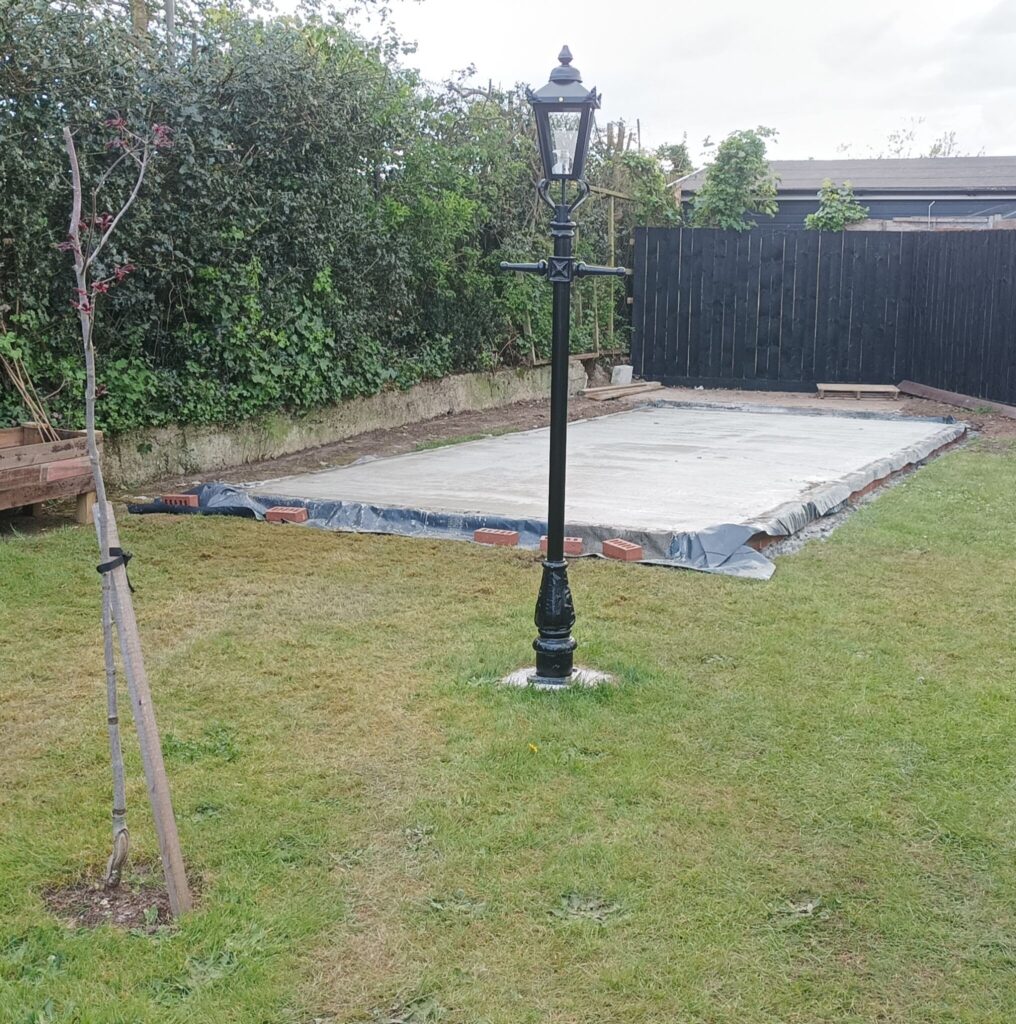
So instead we got the builder to do just the groundworks and foundation, an insulated concrete pad with 2 rows of brick surrounding.
On top of this the plan is to build a post and beam frame with a trust roof. I’ve been drawing up the design in FreeCAD so I can understand the issues and work out how much wood will be needed. The first stage is the framework which currently looks a bit like the following.
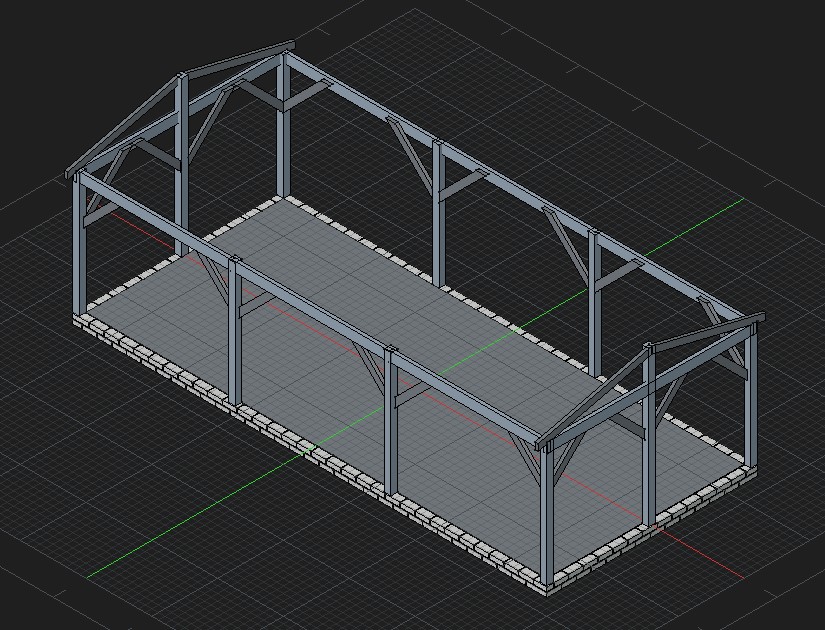
The idea is this framing will built first and then the roof added. And finally the walls will be fitted in the spaces between. I’m not planning any windows but there will power and overhead lighting. A single door will be on the side towards one end. The roof pitch is quite shallow so that the overall height comes in below the 2.5m. This is to meet planning requirements caused by the building being within 2m of the boundaries. Luckily modern recycled polymer tiles can be used on shallow pitch roofs and these are lighter than clay or concrete tiles so that means for a simpler design.
The wood has been ordered for the framing from a local supplier, so assuming the weather holds we should see some progress next weekend.
![]() Posted in: Workshopshed4
Tags: Workshop
Posted in: Workshopshed4
Tags: Workshop


 Metal sculpture in brass, mounted on an 1800s French Coin


Ambitious, hope it goes well.