

Footings and framing
Although some timber-framed buildings simply rest on their foundations, I wanted mine to be fixed down. We do get some very high winds around here and we’ve already lost a small greenhouse and I also don’t want the weather driving in under the walls. So I purchased some metal fittings which had previously been used successfully on a pergola.
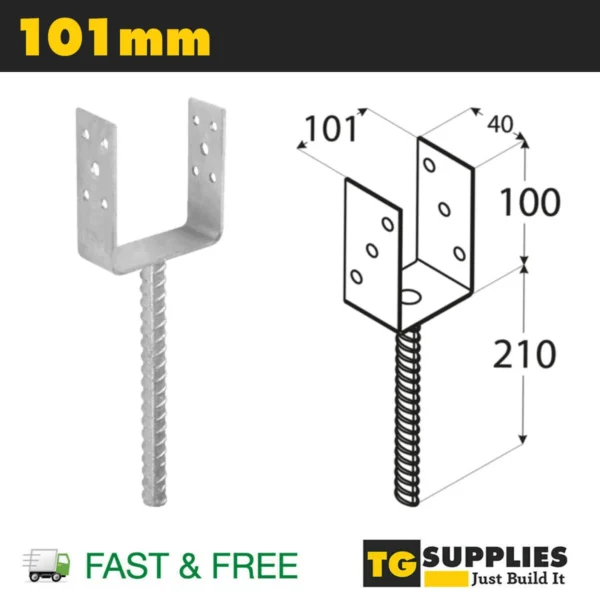
The idea being that the spike on the fitting is set in concrete or some other solid material. So in my case into the brickwork around the base.
However, there was an issue. The holes for the fittings were positioned exactly in the middle of one of the webbings across the bricks. I wondered if this was going to be an issue so I tried to drill one of the spare bricks, in the exiting workshop. After a very slow drill the bit eventually came out the other side, smashing the back off the brick in the process. It was at this point, I learnt the difference in chemistry for engineering bricks vs London stock bricks. When engineering bricks are fired they are done some at a higher temperature. So more of the sand in the brick turns to silica. Naturally occurring silica is called quartz a very hard mineral which is formed when sandstone meets magma or lava. As well as hardness the brick reduces in porosity and increases in brittleness. I tried drilling without the hammer action but that just resulted in a hot drill bit and very little progress.
So, for some of the fixings, I could move them a few cm and use the existing holes in the bricks. These mostly lined up but still needed a little drilling. But on the corners this wasn’t an option. I did managed to get through the top brick without issue but the lower bricks proved to be problematic. The first corner smashed and I swapped in a London stock brick from the garden, the second one the whole of the corner broke away so the brick was drilled out separately and then the corner was remortared together. Corner 3 was slow going and was competed without issue. But the last corner, both the top and bottom bricks smashed so were all replaced with the more easily drilled London stock bricks. The results are a little messy but this corner will mostly be hidden in gravel as there is a slight slope to the garden. I’ll likely give it a clean up with a wire-brush once it’s dried.

Once all the holes were made, I used postcrete to fix in my corner fittings and grab adhesive for those which just had a small drilled hole.
For the frame, I ordered some treated wood from my local timber mill along with some 100mm x 100mm posts for the uprights. I had hoped that the joint for the horizontal beams would meet on a post, but it was about 150mm short. I did think about moving the footings but yngmas from Mastodon suggested I join the beams using a scarf joint. After watching a number of video on how to make these, I combined the dimensions/geometry from Skillbuilders scarf joint video with some handcut references as I don’t have a plunge cutting circular saw to use.
I drew up a sketch to confirm I understood how to make this.
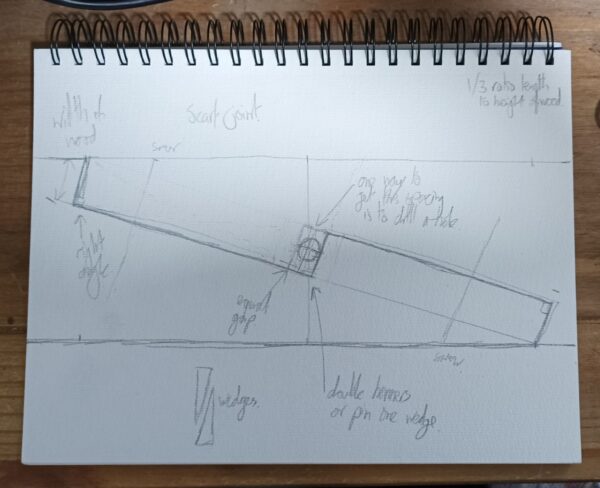
I had a “Good idea” of using a drilled hole to size the slot for the wedges. This didn’t work as the drill moved enough for it to no longer be central and it also took a good time to drill as my spade bits are not too sharp. So marking and measuring for the next one.

After a lot of fine tuning with a surform and chisel, I got the joint to fit nicely and to pull up with the wedges. My top tip here is to make the wedges with a blunt end so you can more easily knock them back out after a test fitting. As suspected this joint doesn’t hold up too well to twisting so I added a couple of 6mm framing screws. I then did a test where the ends of the beam were put on the horses. It seemed to hold up well to this so I have confidence for when it is placed on its four posts.
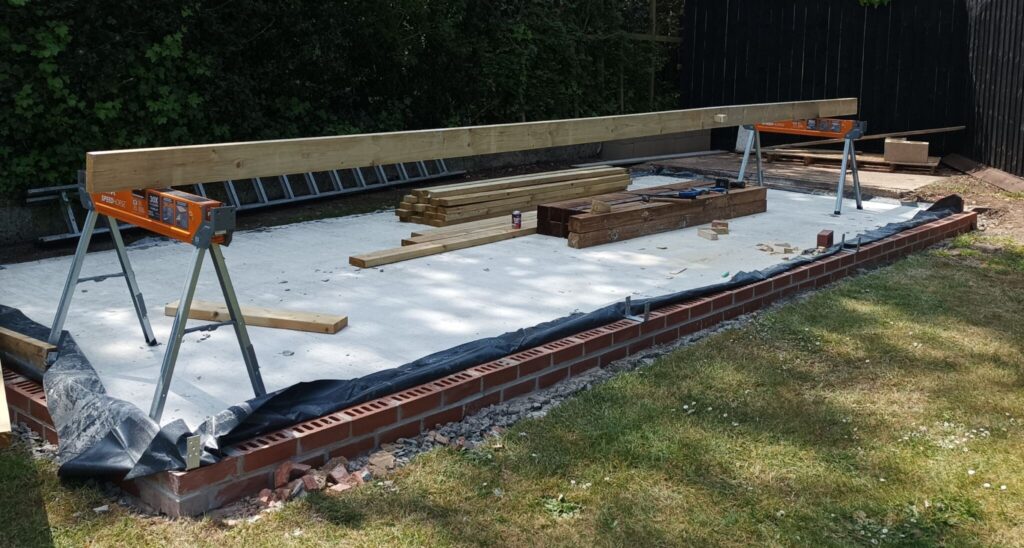
The posts are still being cut to size/shape so more on that next time.
![]() Posted in: Workshopshed4
Tags: scarf joint, wood framing
Posted in: Workshopshed4
Tags: scarf joint, wood framing


 Metal sculpture in brass, mounted on an 1800s French Coin


