

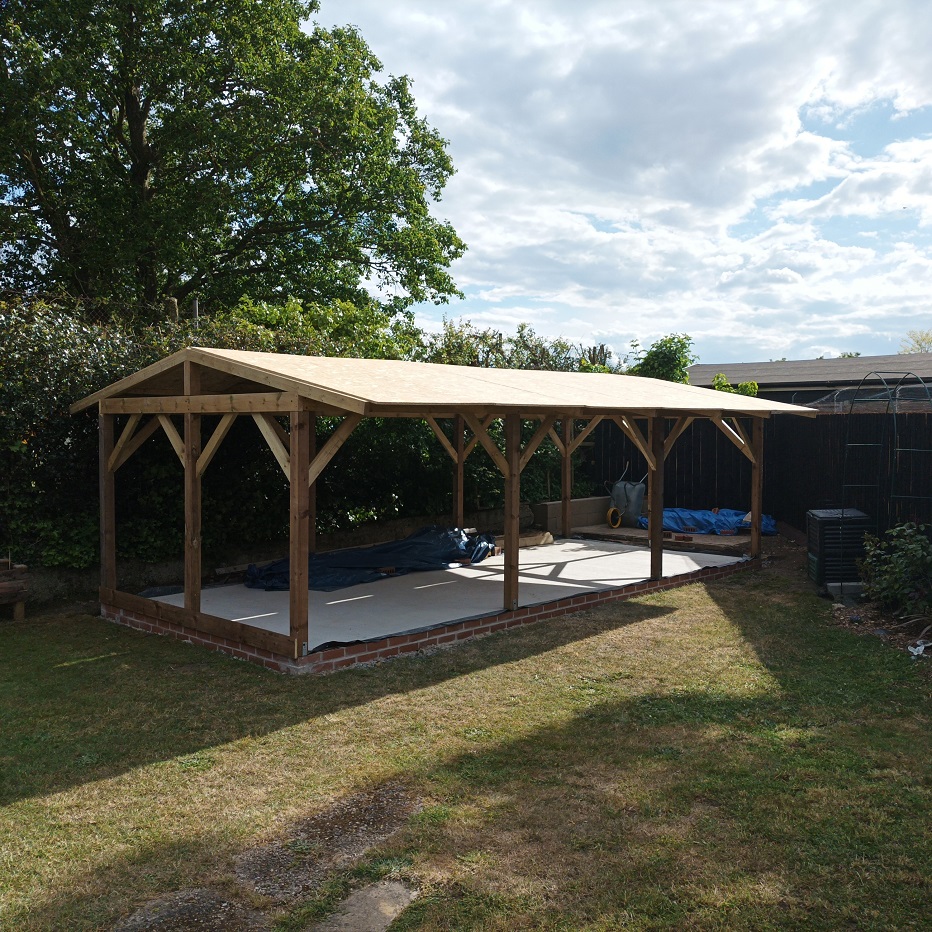
Posts, Beams and Trusses
Construction of Workshopshed 4 is progressing and the posts, beams and roof trusses are all installed along with some boarding on top, thanks to an old college mate.
The corner and end posts were installed into the fixings. They were positioned roughly in place and supported by some cross bracing before being checked for vertical and screwed into the fixings. The cross beams were then lifted into position and clamped in place. The posts were checked to be vertical once more and after some fine tuning, the beams were screwed into place. The front beam turned out just a few cm short but was sufficiently on the post to be supported. The process for the back wall was the same and strangely that beam was spot on in length. Could be the builders got the base slightly wrong but more likely subtle differences in how I made the scarf joints. I’ll get the tape measure out at some point to check.

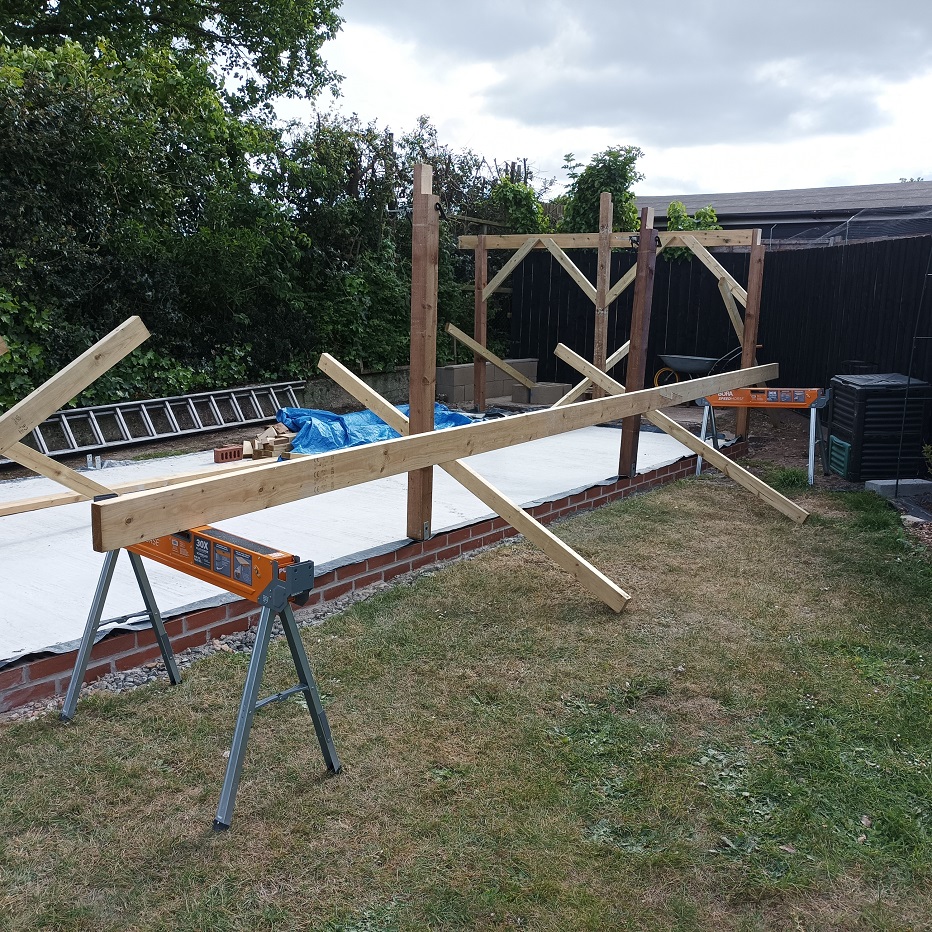
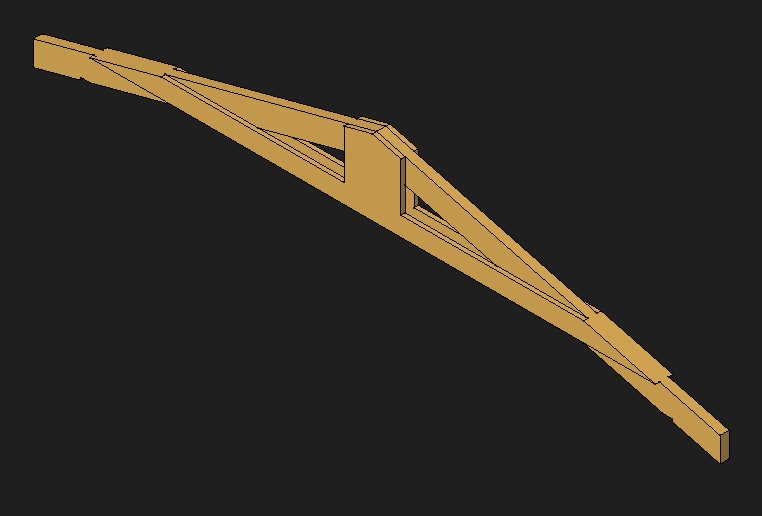
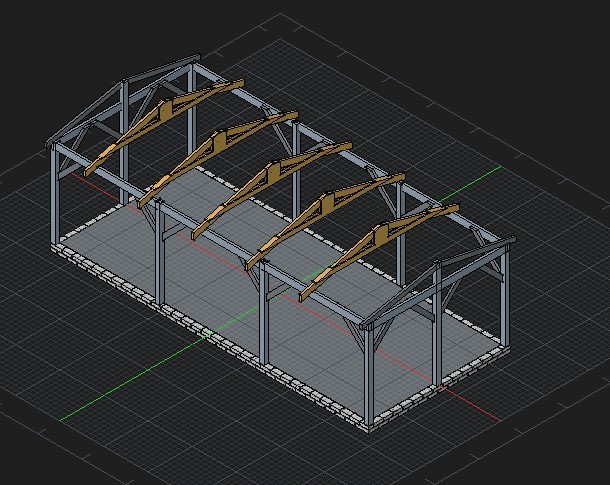
I decided that the roof would be a truss design rather than top beam and rafters. I thought this would be easier to assemble and would use less wood, the roof does not need to be overly strong as the tiles being used are light weight. The spacing of the trusses was measured out at 1.22m, the width of a sheet of OSB, that meant I’d need 5 trusses. After studying different truss designed, I went for a simplified king post truss with a raised tie beam. This would allow for plenty of head height and storage possibilities in the workshop. It could also be easily created from standard timbers.
I made a bit of an error with the CAD design in that I made it all as one part in the FreeCad Part Design Workbench. So you don’t see the separation of components and we can’t do things like exploded drawings. I’ll likely redo that at some point. But this was sufficient to allow the wood to be ordered and the parts assembled
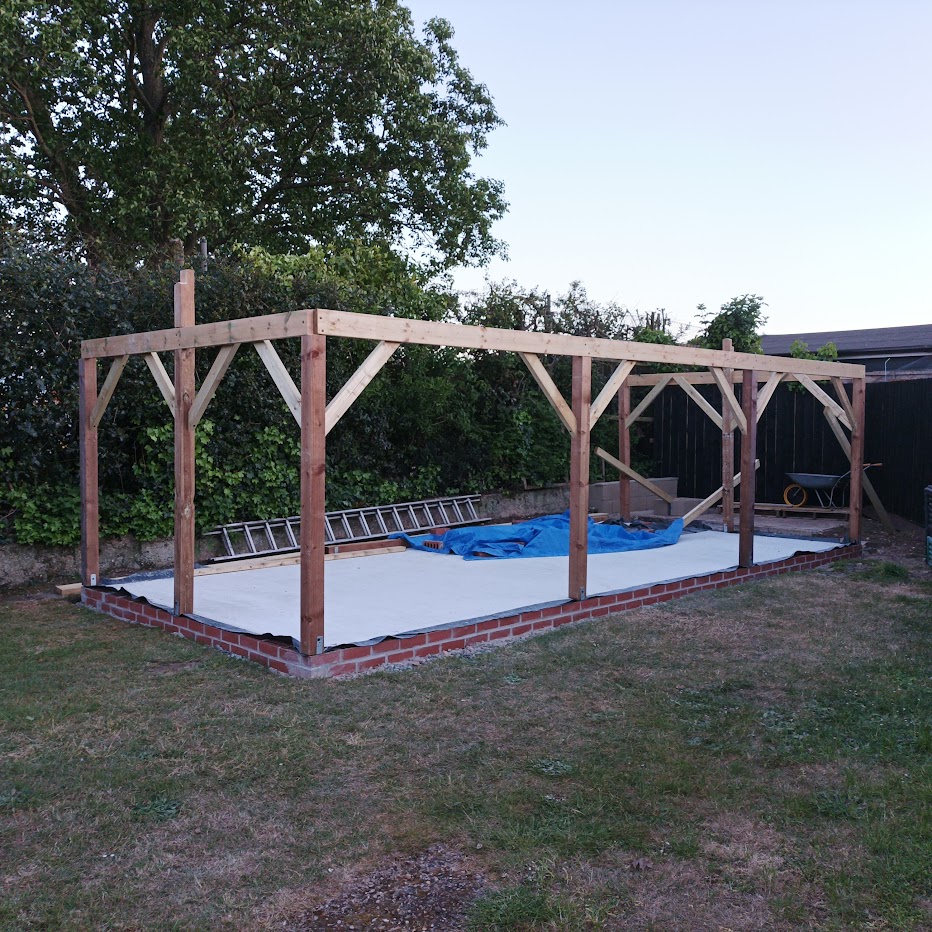
The end rafters were fitted first so I had a reference for the angles. The first truss was assembled and fitted into the middle, the remaining were spaced out from this. However, once the 2nd and 3rd trusses were installed I realised a mistake had been made with the first one. A digital angle gauge confirmed this and that I had made it with a slope of 10° rather than 12.5° for the rest of them. Luckily this was spotted before the roof sheets were added and could be fixed. The low pitch is to keep the overall height of the workshop below the permitted planning restrictions without making the door or walls too short.
On this last Saturday my old college mate Russ Casey came to help out. He’s in the middle of a house build project so welcomed a break for some more building. Together, we finished and fitted the last two trusses and had a brief pause for a topping out ceremony and some lunch.
In the afternoon we cut purlins (cross struts) to fix the trusses together. It was interesting to compare our two woodworking styles as Russ has fully embraced the power tools, where I am happiest with hand tools. His electric nail gun definitely made light work of fixing the purlins even if it was a bit scary.
When we came to fit the sheets it was definitely good that there were two people as the boards slid when you didn’t want them two and didn’t move when you did. Because of the limited access at the rear the boards were pushed up and over, a job for two people. Again the nail gun came in handy to tack these in place. Russ also provided a raised platform which really helped reaching the top. The subtle variations in the assembly of the trusses meant we’ve got a bit of a gap along the ridge but this is small enough to be covered up by the ridge tiles.
Next job is to provide a bit more support for the boards as some of them are very close to the edges of the trusses. Once that’s done, I can get up there and trim the roof to size. Seems a shame as the overhangs look lovely but there’s neither the space nor sufficient tiles to make it bigger at this point. The roof will be covered in a breathable membrane and then the tiles nailed down on top. More on that next time.
![]() Posted in: Workshopshed4
Posted in: Workshopshed4


 Metal sculpture in brass, mounted on an 1800s French Coin


